SPONSORED CONTENT -- (StatePoint) If you’ve spent a full Saturday committed to the 3-2-1 method for ribs, you know the math: three hours of smoke, two hours wrapped, one hour to finish.
But six hours is a long time to watch a smoker. Ben Palmer, the pitmaster behind Grill This Smoke That and Exmark ambassador is sharing his time-saving strategy for putting some of the best ribs you’ve ever made on the table in about three-and-a-half hours, while even having time to stripe the lawn while they cook:
Ingredients:
Ribs
2 racks of pork spare ribs or St. Louis–style ribs
Yellow mustard (binder)
3-4 tablespoons all-purpose barbecue rub
3-4 tablespoons honey powder rub (or sweet rub of choice)
Butter Bath Pour-Over
1/2 stick (4 tablespoons) unsalted butter
2 cups apple juice
1 tablespoon all-purpose barbecue rub
1 tablespoon honey powder rub
Directions:
Remove the membrane. The first thing that separates good ribs from great ones isn’t what you add to them, it’s what you remove: the membrane on the bone side. This is because the membrane doesn’t break down during cooking the way the surrounding meat does—it stays tough, fights every bite, and blocks the rub from doing its job. To remove this membrane, start at one corner, use a paper towel for grip, and pull it free, then remove remaining strips, if any. Thirty seconds of work, and the finished rib is a completely different eating experience.
Apply binder. Before seasoning, add a binder. Yellow mustard works well and won’t leave any trace of mustard flavor on the finished ribs, but it gives the rub something to grip. Without it, you’ll lose seasoning every time you handle the rack.
Season in layers. Start with an all-purpose barbecue base, then add something with sweetness on top. A rub with honey powder builds color as it cooks and rounds out savory notes underneath. Apply the same process to both sides.
Rest. Once the racks are seasoned, get them into the fridge. They can sit for up to 24 hours, but even one hour gives the rub time to set and you the window to fire up the smoker and dial it in.
Fire the smoker. Start at 275 degrees F, bone-side down on the bottom rack. That initial higher heat sets the bark faster and gets smoke working into the meat right away. After that first hour, flip the racks meat-side down, move them to the top rack, and drop the temperature to 225 degrees F.
Make the pour-over. One of the best things about smoking meat is what it frees you up to do while it’s happening. After the first rotation, stripe the lawn or water the garden while the ribs do their thing. Right after that, put together the butter bath pour-over: combine half a stick of butter, 2 cups apple juice, and about a tablespoon of each of the rubs you used in a small pot. Set it in the smoker to melt and heat up.
Flip again. After the second hour, flip ribs meat side up and rotate positions in the smoker for even cooking. Continue at 225 degrees F, checking periodically.
Wrap. When the bones start to protrude from the meat, that’s your cue to wrap the ribs. Lay out two sheets of heavy-duty foil. Place each rack meat-side down, pull the edges up to hold the liquid, and pour about half the butter bath over each rack. Wrap them tightly (no gaps) and get them back on the smoker.
Unwrap the ribs. After 30 minutes wrapped, unwrap the ribs. If you want to sauce them, this is your window. Otherwise, brush a layer of the butter bath across the top and get them back on the smoker to cook uncovered for another 15 to 20 minutes.
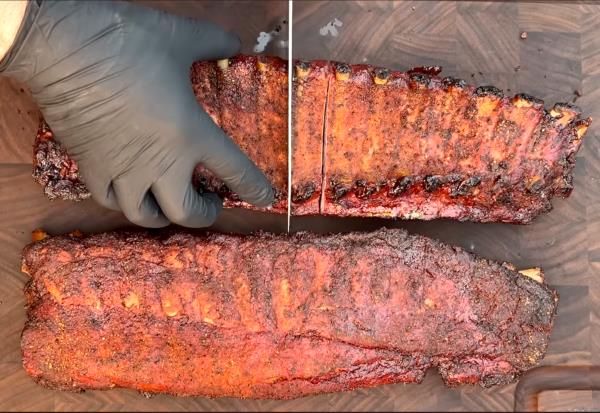
Then, pull a bone from the middle to check your work. A clean smoke ring and juicy meat that holds together without falling completely apart means you did it right. After that, all there’s left to do is throw them on the board and call everyone over to enjoy.
For Ben Palmer’s full methodology, as well as inspiration for how to care for your lawn while your ribs are cooking, visit Exmark’s Backyard Life site, a unique multimedia destination with a focus on helping homeowners make meaningful improvements to their outdoor living experience.
The 3-2-1 method takes six hours and has the potential to produce ribs that fall apart too easily. You can shave off hours of preparation time and achieve that bite that competition-style ribs are known for.
